Some posts only go to subscribers via email. EXCLUSIVELY.
You can read more here or simply subscribe:
How to set up a new niche site in 20 Steps [My Checklist]
Sharing my checklist for launching a new website. A detailed list with 20 steps that cover everything - from finding the right niche to publishing posts.
Over the past couple of years, we’ve added eight new sites to our portfolio, at the rate of roughly one per quarter. Adding a new website takes time and a little bit of effort. Since we won’t be adding new sites in the coming few months, I decided to write down all of the steps required for launching a new site.
This checklist is for my own use as well. When the time comes to add another site, I’ll be able to go back to this post and follow this checklist too.
Contents
1. Choosing the right niche
Like many other web publishers, I have niche ideas running through my mind all the time. When I come across one that seems to have good potential, I jot it down. When it’s time to launch a new site, I have a list of 2-3 good options from which to choose.
Choosing a niche is worth a post in its own right, and I won’t go into the in’s and out’s of it here. Whatever the niche, the following stages will apply in the same order.
2. Creating the content plan
The first step for me is to create a content plan with the first 100 writing topics. Some people start by choosing a domain name and setting up WordPress. I don’t. Unless I have a solid content plan, there’s no point in doing anything else.
When working on the content plan and doing my search analysis, I sometimes discover that the niche isn’t as good as I thought it would be. The search volume for most topics may be too low, or competition for long-tail queries too intense. Or maybe the niche turns out to be very technical or lends itself too well to videos instead of blog posts.
If I’m struggling to come up with 100 topics, or something just feels “off,” it’s easy to stop at this point and try another niche.
Using a spreadsheet for the content plan
If you’re about to create a large website with the potential for hundreds of posts, you should consider an adequately organized spreadsheet.
I have a master sheet, ready with the right columns and tabs that I use. When working on a new site, I just make a copy of that sheet and start working on adding new topics. At this point, I only fill in the title of the post, category, silo, and the type of post (informational, products, etc.). Later on, as the posts move into production and eventually are published, we’ll add the word count, date of publication, and the post URL.
3. Setting up silos
Most niches are usually relatively large. Even a small niche should be able to have at least 100 posts. These days, I don’t start a new niche unless I think it could cover at least 200-300 posts to make a decent small site. Most of my niches are large enough to have thousands of posts down the road.
Before I can start with keyword research, I organize that content into manageable chunks. The first division is into categories. Then, within each category, I try to come up with topics for silos – i.e., collections of 20-100 posts around the same topic.
For example, let’s say I launch a site about boating. My initial categories could be –
- Boats
- Sailing techniques
- Sailing trips
I will then try to break these down into silos. For boats, the silos will probably be types of boats such as pontoons, cruisers, pilothouse boats, and catamarans. For sailing techniques, I may plan silos around steering, heavy weather sailing, navigation, and safety. For sailing trips, I’ll probably go with popular destinations.
Mind you, I don’t know much about boating. The above suggestions are based on a couple of minutes of Googling. In reality, if I don’t know anything about the topic, I would spend 2-3 hours to research it first. If I am familiar with the subject matter, I move ahead with the initial categories and silos based on what I know. They don’t have to be perfect, and they’re likely to be adjusted down the road.
4. Keyword research/Search analysis
Now comes the fun part: panning for gold nuggets!
Gold grains and nuggets are traffic queries that no one else has appropriately answered yet. They are scattered all around the vast Google river, and I’m going to look for them.
Since the site is brand new, I won’t fight over the larger nuggets. Instead, I’m looking for grains of gold out there. With enough grains of gold, the site can bring in a small fortune.
Ok – enough of the metaphors and back to web publishing terms: I’m looking for long-tail search queries that don’t have significant competition.
My content plan needs to have 100 such queries, and I try to balance it out so that it covers at least 5-6 of my silos. That means about 15-20 items per silo. Even if the silo has more potential topics, I’ll stop at 20 because I want the initial content plan to be varied.
I also make sure to cover a variety of post types. Generally speaking, I shoot for this mix –
- 70% long-tail informational response posts
- 15% product posts
- 15% topics guides and tips lists
Once the 100 posts are published, I’m going to give the site some time to mature in Google. About six months later, when I get back to analyze the results, I want to have some variety, so I can gauge what worked and what didn’t. Which topics and post formats work well for this specific niche – and which don’t.
5. Creating a Clickup space for the site
Clickup is the project and task management platform that I use. Each site has its own Clickup space, where I keep organized task lists. Each blog post becomes a task within that space. That task/post can then be moved around between team members while writers, VA’s, editors, and I handle it over different phases in its lifetime.
It may sound complicated, but it really isn’t. When you work on 150 posts each month with dozens of team members, it helps speed things up and keep everything organized.
If you want to read more about it, here’s my post about how I use Clickup to manage my business.
Back to the new site checklist –
At this point, I create a space in Clickup for the new site. I already have a template for that, so the process is fast and painless. Within a couple of minutes, I have a space set up with the right folders, lists, and statuses.
6. Placing the final list of topics in Clickup
I now copy the list of topics that I have in my content plan and paste that into the appropriate list in Clickup. The system recognizes that this is a list of items, and breaks the copied content into 100 neat tasks. Each task title is the title of the post we’ll be working on.
Going over the list, I use the multi-check interface on Clickup, to quickly mark them by type: informational, product post, tip list, etc. I then assign these to my Chief VA for the next phase.
7. Task descriptions for topics
My VA now adds the task descriptions to the topics. He uses our templates, which include room for listing additional questions. Once the templates are in place, I can allocate these tasks to an editor for tweaking.
At this stage, the tasks enter our production cycle. While the team is working on the task descriptions “behind the scenes,” I move on with the next stages of setting up the site.
You can read more about how we create task descriptions for writers here.
8. Choosing a domain name
At this point, I know for a fact now that I have a solid list of 100 posts. This project is moving forward, and we need to set up the actual site. It’s time for choosing a domain name.
I don’t spend too long on choosing the perfect domain. I’m just looking for a “good enough” domain name that meets the following criteria –
- Has a .com extension
- Up to three words and five syllables in total
- Includes the niche somewhere in the name
- Is relatively easy to pronounce and type in
All in all, it takes me about an hour to find a decent domain name.
9. Getting a logo
Now that I know what the domain name is, I can order a logo. I just go to Fiverr, find a decent logo designer, and order a logo for $5. I skip the extras but provide clear instructions on what I need. I blogged here on how I order my logos on Fiverr. It usually takes 2-3 days for the logo to arrive, so I move on with my other steps.
10. Connecting Cloudflare
I use Cloudflare as a CDN for all my sites. I use the free version, and it works well for me. After buying the domain on Godaddy, I set up a matching account for it at Cloudflare. I then adjust the nameservers at Godaddy.com so that they point at Cloudflare. From that point on, the domain records are managed via CF, so no one needs to log into Godaddy.
11. Creating an account on the server
Currently, I host my sites with Digital Ocean. They have a superb infrastructure at very attractive prices. The caveat is that you don’t have Cpanel, and they don’t offer admin support. This works for me. They provide a super fast and reliable server that handles my 800K pageviews or so for only $60 a month. Whenever I need admin services, I just go to my admin and pay him for the work. A good server admin can install a site in 10 minutes or less, costing me $50 tops, once every several months.
Which is what I do at this stage. Ask my admin to set up a new account on our server.
12. Installing WordPress
Since switching to DigitalOcean, I let the admins install WordPress as well. If you have to install WordPress by yourself, it’s entirely doable. Been there, done that, more times than I care to remember.
Otherwise, you could ask your host to install it for you. It shouldn’t take them more than five minutes. WordPress calls it “the famous 5-minute installation” for that very reason.
13. Adjusting WordPress’s settings
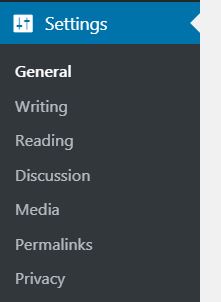 I now go to the fresh installation, find the settings in the menu, and go through these pages one by one. I make sure to get my permalinks right at this stage too.
Now is also a good time to delete the default WordPress post and category, for a clean-slate installation.
14. Creating categories
It’s time to follow the category structure that has been laid out in the content plan and create the same categories in the blog. That way, once the writers begin entering posts, we can assign each post to the right category.
15. Adding basic plugins
Plugins. Can’t live with them, can’t live without them.
I don’t like using too many plugins. It’s risky – in more ways than one. However, you have to have some plugins to get your site up and running properly. Over time, I’ve accumulated my set of plugins, just like every other web publisher.
With a new website, I install the following plugins –
- Akismet anti-spam
- Classic editor
- Header-footer code manager
- Litespeed cache
- Shortpixel image optimizer (paid account)
- Table of Contents Plus
- Updraft plus for backups (see my review here)
16. Template design
I currently use OceanWP as the template for all of my sites. It’s robust, flexible, fast, and has good paid support. After uploading the template, I go over its settings, copying everything from an existing site. I already know what needs to be tweaked and how. I usually have my logo by now, so I can add that as well.
I don’t set up a fancy main page. I just use OceanWP’s grid setup to create a basic main page that displays a grid of pretty images instead of the usual “WordPressy” list.
This entire step takes another 15 minutes. Tops. The site needs to look decent – not perfect.
17. Creating user accounts in WordPress
I create an admin account for my Chief VA. He will add accounts for the writers later on, and manage user accounts for the site moving forward.
18. Adding Google Analytics
I don’t expect any traffic for the first month or two. Still, when it starts coming in, I want to be able to see it and have a good record of the initial trends. Adding Google Analytics is easy enough to do, so I just get it over and done with at this point.
19. Setting up emails
I like to have contact emails for the domain. Since DigitalOcean doesn’t support emails, I use Mailgun instead. Mailgun used to be free until you reached a particular volume of emails for your entire account. Now they only offer the first three months for free. I only started paying for Mailgun very recently, and it now costs me $35 a month for all of my sites.
When launching a new site, I adjust the mail records on the domain, set up an email route via Mailgun, and set up a team@ contact email for the site. I then add that to our business Gmail account, so that my Chief VA can receive and send email using that email address.
20. Bringing the writers in
The site is all ready to start rolling. We should have enough tasks with task descriptions for the writers, and a reliable blog where they can enter these posts. My Chief VA contacts 3-4 writers to see if they’re interested. He then adds them to the blog with writer-level accounts and opens up the appropriate Clickup space for them too.
Voila! A site is born!
From that point on, it’s smooth sailing. Having checked all of the items in the “new site checklist,” we have a new site. Our content producing van now gets to work, humming along as it fills that site with quality content.
What’s next?
Within 2-4 months, we’ll usually have the initial 100 posts published and can let the site rest for a while, to see how it’s doing.
Once we get those initial 100 posts in, we’ll also launch a Pinterest account for the site, with its Tailwind account. These days, I follow Jon Dykstra’s Pinterest method, which works very well with outsourcing the work to VA’s. At that point, I may also add Elementor Pro and create a prettier front page.
Next comes the fun part of tracking the site. Usually, 5-6 months after we published the initial 100 posts, I can tell how things are going. At that point, if the site shows a lot of potential, it’s time to start pushing more content and growing it into a more significant authority website.
I hope you found this list helpful, or at least a little bit interesting. If you have your own routines and methods and can help me improve my own – please let me know! As always, all comments and questions are welcome!
Great great great article Anne. This is super helpful for anyone launching a new site to see the step-by-step details of the process successful publishers like you take to set up a new site. Thanks for sharing all these details.
Thank you, Jon! That’s high praise coming from you!
Hi Anne,
After 5-6 months, how much traffic do you expect to decide if the site has potential and you should invest more resources into it?
Wow, great question.
Six months after the site was published, there are usually at least 2-3 posts that bring in several hundreds of pageviews a month each. I would expect the site to make 5K pageviews a month at that point. This is about the overall growth trend, more than actual numbers. I’m looking for a nice curve, with traffic from Google and maybe Pinterest too. I also look at stats from Amazon. The site should have had a total of 10K pageviews by then, so I’m expecting a bunch of Amazon sales as well. Around $50 in Amazon revenue means the niche is relatively attractive. When we get to the point where display ads are added, it should bring in at least $12-$15 RPM altogether. That’s enough to go by.
So far, the only niche site that hasn’t “worked out” is the experimental finance site. All of the other sites seem to be doing well and I’m pushing forward with them.
Thanks a lot for explaining that Anne. Really appreciate it.
Love your content, Anne! It’s one of the “stickiest” blogs I’ve come across in a while. I plan on following this process exactly once I figure out a niche. Steps 1-4 seem to be where I get blocked. Anyway, thanks for putting this together. P.S. – It’d be cool if you added the option for commenters to be notified when you reply 🙂
Thank you, Mitch! I’ll definitely look into that option. I’ve seen it around and need to figure out how to implement it here.
Thank Me Later. This plugin does what Mitch is talking about.
Hi Anne,
Is there any possibility for you to share the master spreadsheet? 🙂
Hi Rudi,
Sorry, but I prefer not to share that. I will say that it’s not super complicated and mostly includes the title, URL, publication date and the number of words. You can just set one up with your own parameters that you’d like to track. I think the important thing is to have a solid list of your posts so you can then analyze them.
Hello Anne,
thanks for this super helpful blog.
Could you cover a little bit how you estimate the search volume for a new site?
Thanks!
Hi Martin,
I’m glad you enjoy the blog! I tend to go with rather large niches for the domain name, and then drill down for longtail terms. So the real question is how to find the queries that have enough search volume within the niche. I don’t have a good answer for that one, other than just using common sense and some intuition – and not always getting it right!
One good indicator is if I see forum/reddit/quora results coming up and there are multiple variations to the same question. That goes to show that people are actually looking for an answer to this. But sometimes nothing comes up and the search volume is still there.
The key for me is to get it right on average. Some posts will fail, and some succeed. On average, they need to make at least 300-400 pageviews per month. So far, that works well for me.
I appreciate you sharing this wonderful post with us, Anna
Are 100 posts published once when the site is created, or do they appear on an ongoing, scheduled basis?
With new sites, we just publish as soon as the posts are ready. No scheduling. We reserve that to established sites that we want to keep on maintaining.
I think you might have misspelled the “lightspeed cache” plugin……I think it’s “litespeed cache”.
Fixed! Thanks for letting me know!
When you’ve published 100 posts, what do you do with the site if you notice it’s not going anywhere? Do you just leave it hanging and not making money? Delete it? Sell it?
I just leave them hanging. No time or attention span to do anything else with them.
I struggle with “Creating Categories” meaning I add categories as I publish blog posts/articles.
Should I create a category during WordPress setup? But wouldn’t that hurt SEO for low-value content? no words just blank pages?
What do you suggest? What do you do with your niche sites?
Hi Hari,
I honestly don’t think it matters. I don’t think Google cares that much, especially now, so it’s more about user experience at this point. The way I work, I create a 2-3 articles in the category before publishing it to the site. I hope this helps!